
Ubuntu Disk Formatting Tutorial: Discover Two Efficient Techniques
Ubuntu Disk Formatting Tutorial: Discover Two Efficient Techniques
Key Takeaways
- Open the Disks app and select the disk you want to format. Click the settings button and then select “Format Partition”.
- Fill in each field, such as the partition name and file system, with the correct data, and hit “Next”.
- Confirm the settings and click “Format” to format the disk.
Need to format a disk on Ubuntu but not sure how to proceed? Disk formatting can seem difficult, especially because it’s about your hard disk and not just software. Here are two easy methods, either of which will format your disk quickly and safely.
For demonstration purposes, I’m using Ubuntu 22.04. But you can follow this guide for newer or older versions of Ubuntu as well.
Read This Before Formatting a Disk
Disk formatting is a risky process. It involves deleting all data from a disk or its partitions. If you have any sensitive data on your device, then make sure to create a backup of it first .
The next thing you must confirm is which disk you’d like to format. If you accidentally format the wrong disk, it may even mess up your whole system. If you have many disks on your device, go through each one to ensure you’re formatting the right disk.
Which Method Should You Use?
Before implementing any of the methods, you should know which one will be the best for you. Both the Disks and GParted apps have graphical interfaces. So, in both methods, you don’t need to write any commands to format a disk.
If you’re comparing the beginner-friendliness of each method, GParted is a bit easier to use and understand than the default Disks app.
However, since GParted doesn’t come installed by default, you need to install it first to do any disk formatting. If that’s not an issue, use GParted. Otherwise, Disks will also do the trick.
Method 1: Formatting a Disk on Ubuntu Using the Disks App
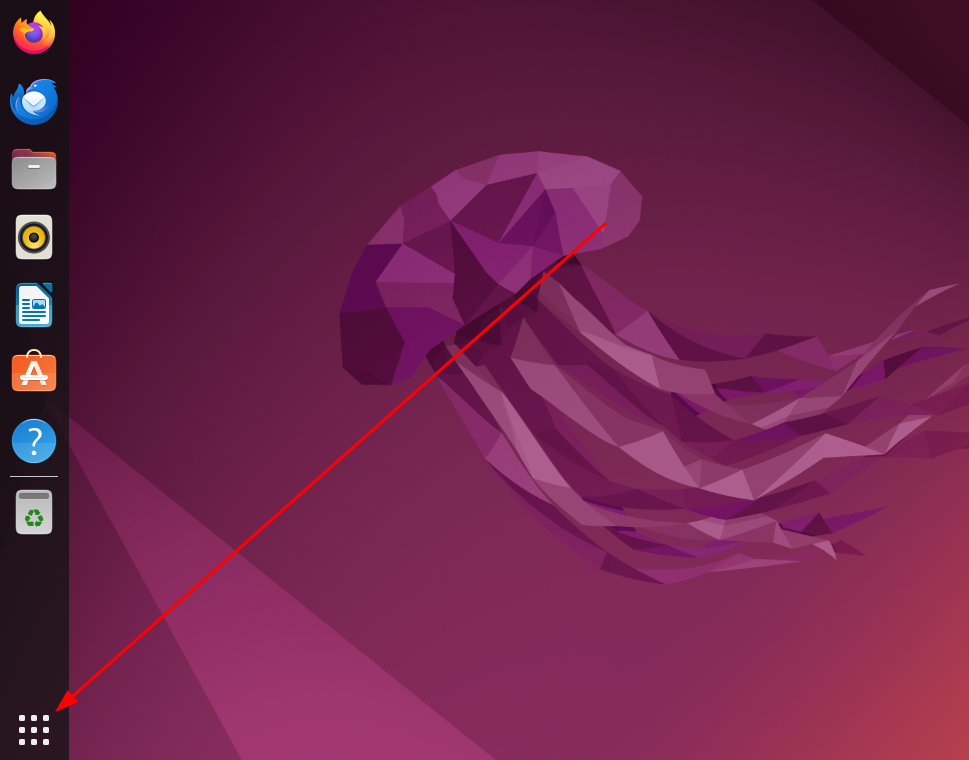
First, open the applications menu by pressing the “Show Applications” button.
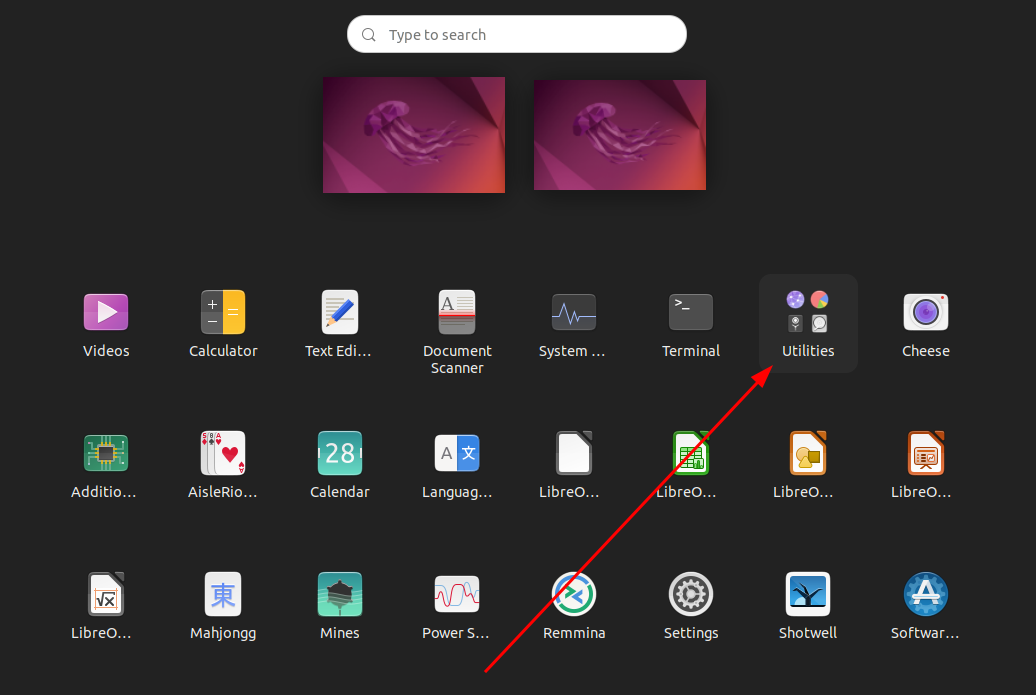
In the applications grid, click the “Utilities” app group.
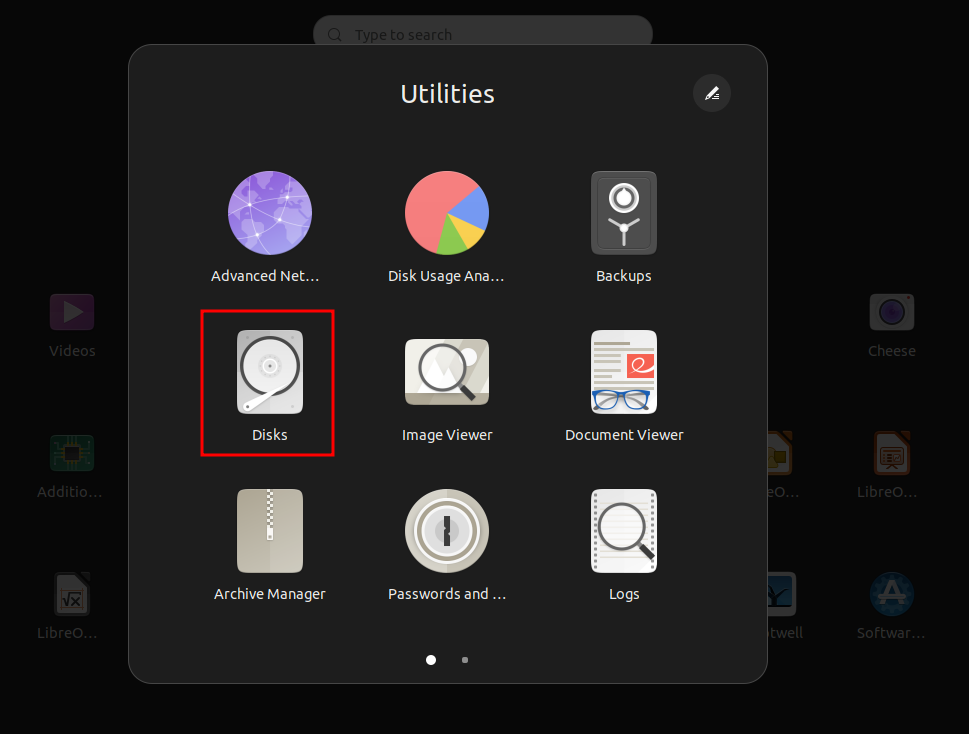
It should display all the utility software on your system. From there, click “Disks” to launch it.
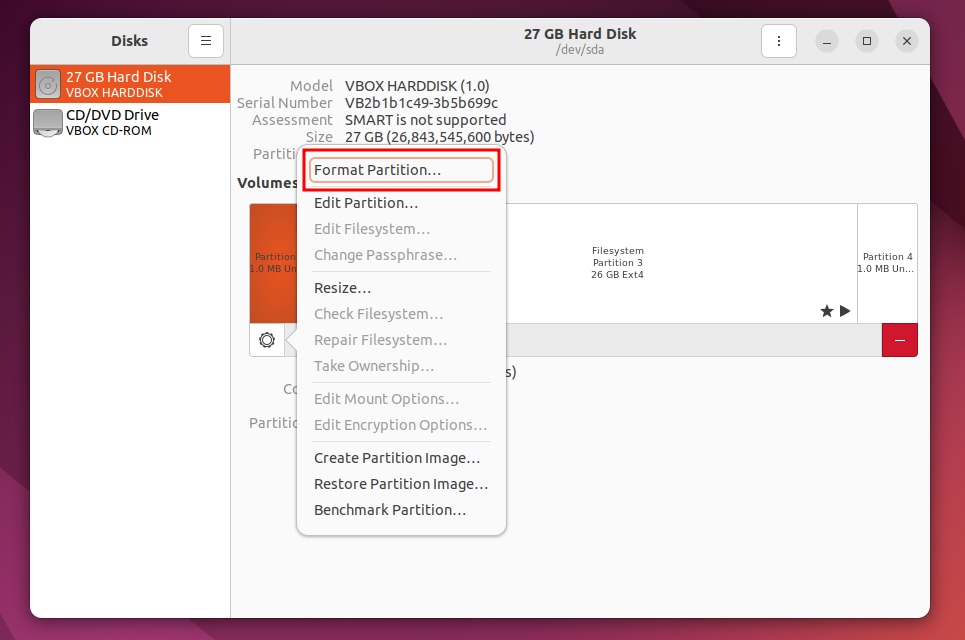
When the application opens, you will find your system storage, both internal and external, listed on the left sidebar. Select the disk that you want to format. Ideally, you’re supposed to have multiple disks from which you will format one or more. In my case, since I’m on a virtual machine, there’s only one disk. After selecting the disk, click the settings icon.
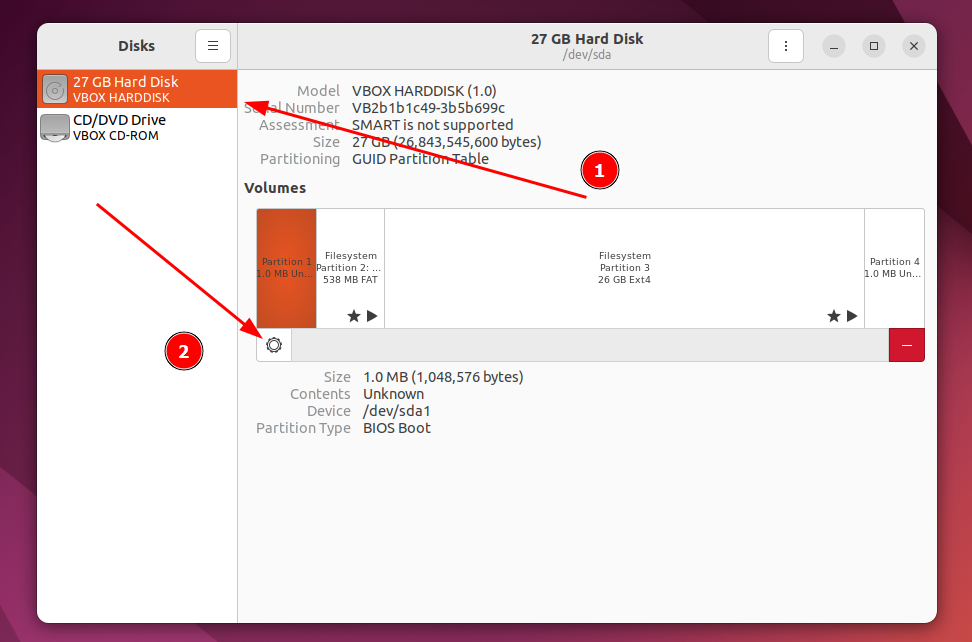
That should open a context menu. Click the “Format Partition” button to continue.
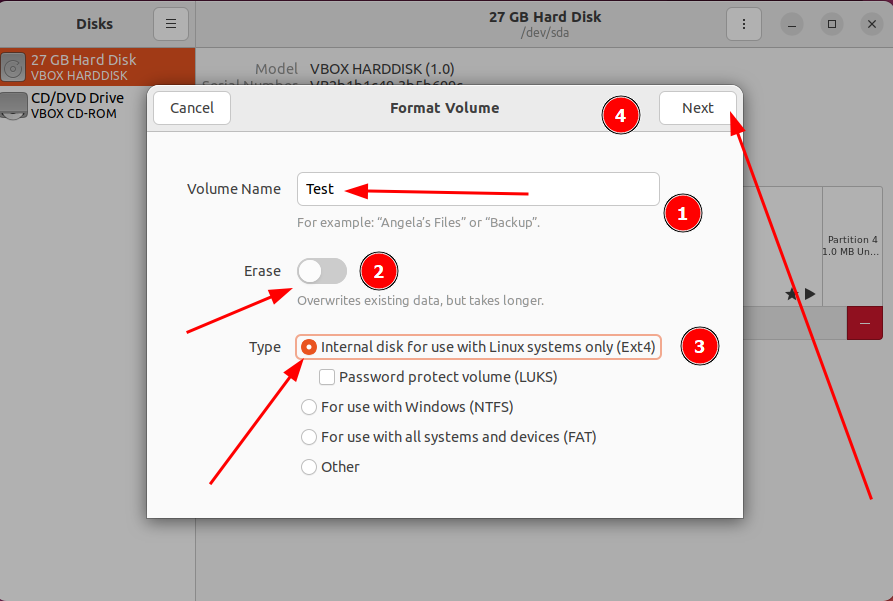
You should see a new menu about the selected volume. There are many options here. Let’s go through them one by one.
- First, you can give a name to the new volume. Insert the name in the “Volume Name” field. I named it “Test”.
- Next, there’s a toggle button that lets you completely delete or keep the existing data. If you decide to turn it on, make sure to get a backup of any important data before you erase it. I’m keeping it disabled.
- Select the type of file system you want to use for the partition. If you only want to use the disk for Linux, you can keep the default “Ext4” option selected. If you want to use it for Windows only, then select NTFS . However, if you want to use the disk for file transfer between several operating systems , go with FAT. I’m going to use Ext4.
Once you’re done with the settings, click “Next”.
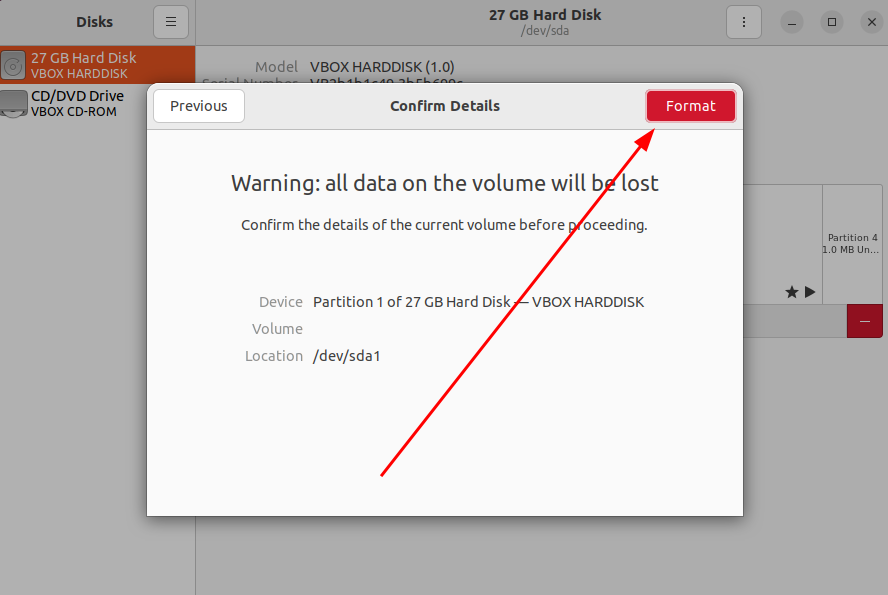
A new window with confirmation details will appear. You can double-check the details here just to be sure. If all looks good, click “Format” to begin the formatting. On the other hand, click the “Previous” button to navigate to the previous window.
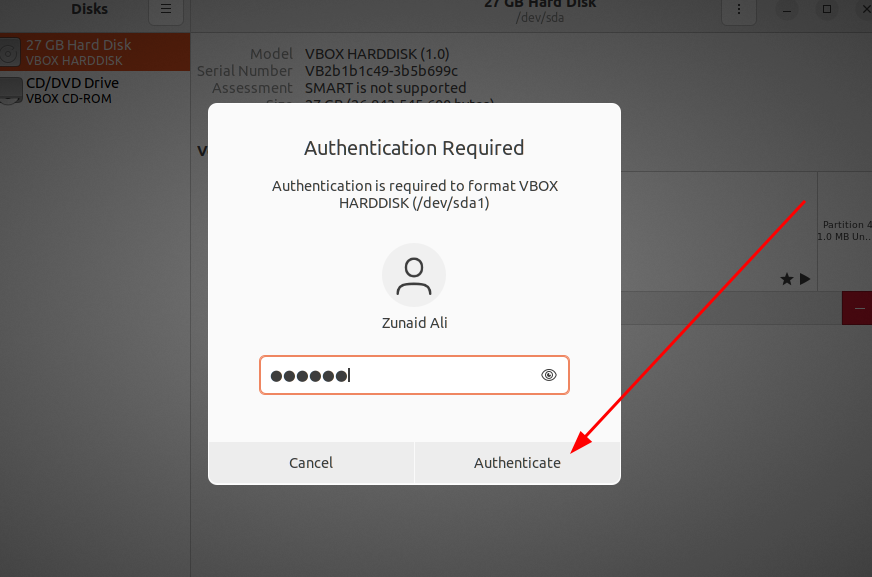
You’ll be asked to authenticate the action. Enter your password and click “Authenticate.”
After that, you will be brought back to the initial Disks window. This time, you will notice a triangle-shaped play button beside the settings button. Click it to mount the partition.
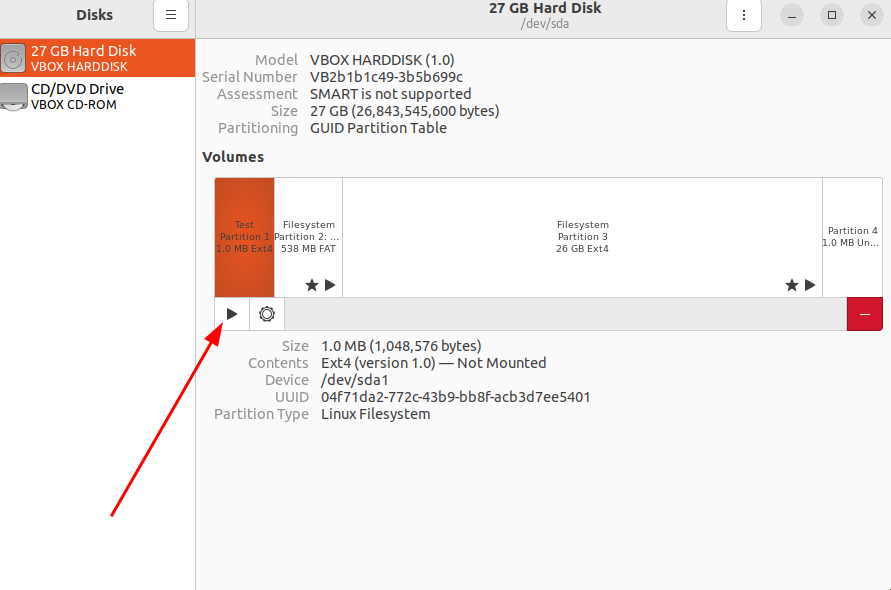
And that successfully formatted your desired disk. There is only one catch. It didn’t create a partition table by default. You can do that using GParted, which I’ll show you now.
Method 2: Formatting a Disk on Ubuntu Using GParted
GParted is a graphical partition editing application. Since it’s not installed by default on your system, you need to install it first.
Before installing it though, you should update your software repository cache to make sure you have access to the latest packages. Open your terminal by pressing Ctrl+Alt+T and run:
sudo apt update
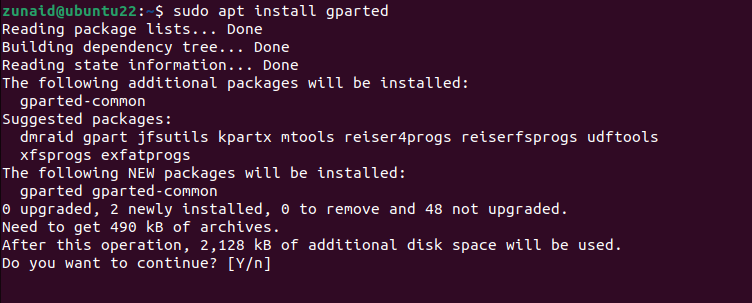
After that, install GParted on Ubuntu by running:
sudo apt install gparted
After GParted is installed, you can either launch it from the applications menu or the terminal. Since you’re already on the terminal, launch GParted using:
gparted
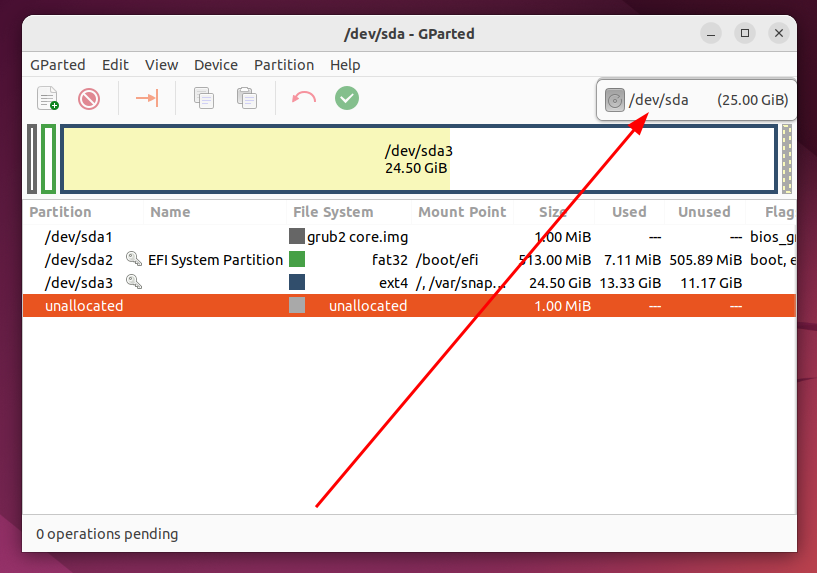
You’ll be asked to authenticate by entering your password. Once you do that, the application should open. The first thing you must do is select the disk you want to format. You can do that from the dropdown menu in the top-right corner of the software. Click the drop-down menu and select a disk.
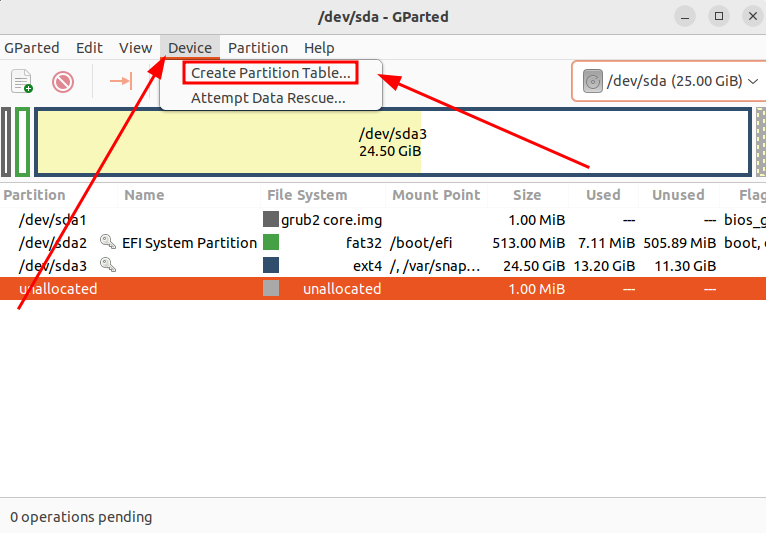
Once selected, you can create a partition table in case you don’t have it already. For that, click “Device” from the top menu bar. Then, select the “Create Partition Table” button.
You’ll get a warning about erasing all the data on the disk. Select the partition table type from the dropdown menu. If you’re unsure, select “gpt” from all the options. Then, hit “Apply”.
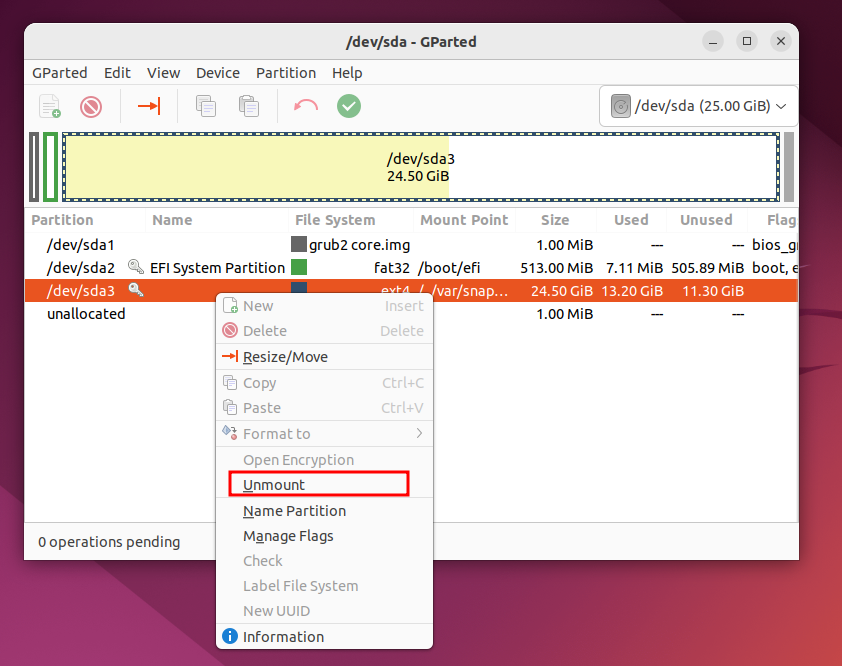
In my case, I already have partition tables created, so I won’t be doing that. After that, you need to unmount the partition. Right-click on the partition name and click “Unmount”.
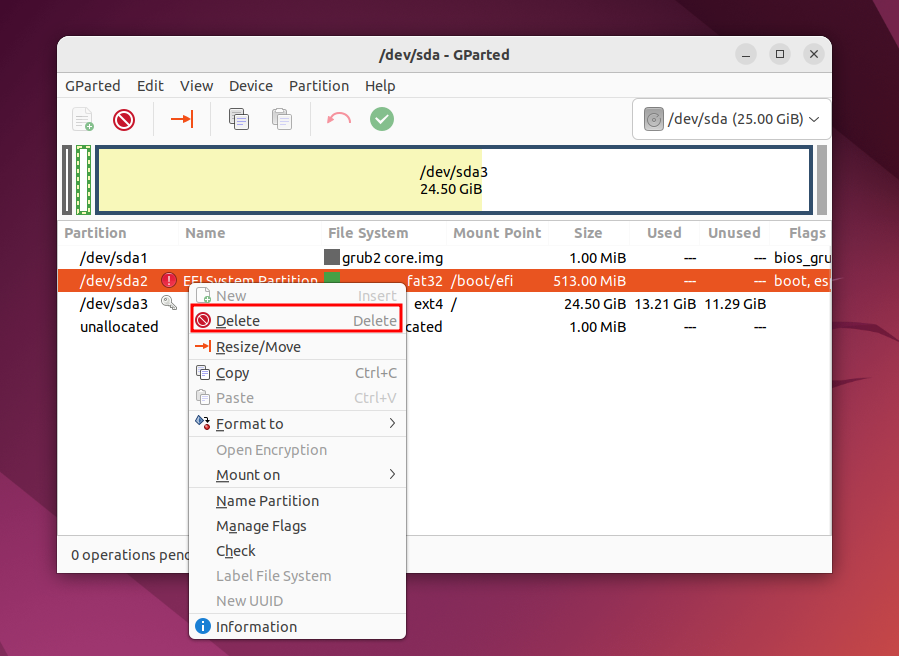
Now you can delete that partition and convert it into unallocated space. To do that, again right-click on the partition and click “Delete”.
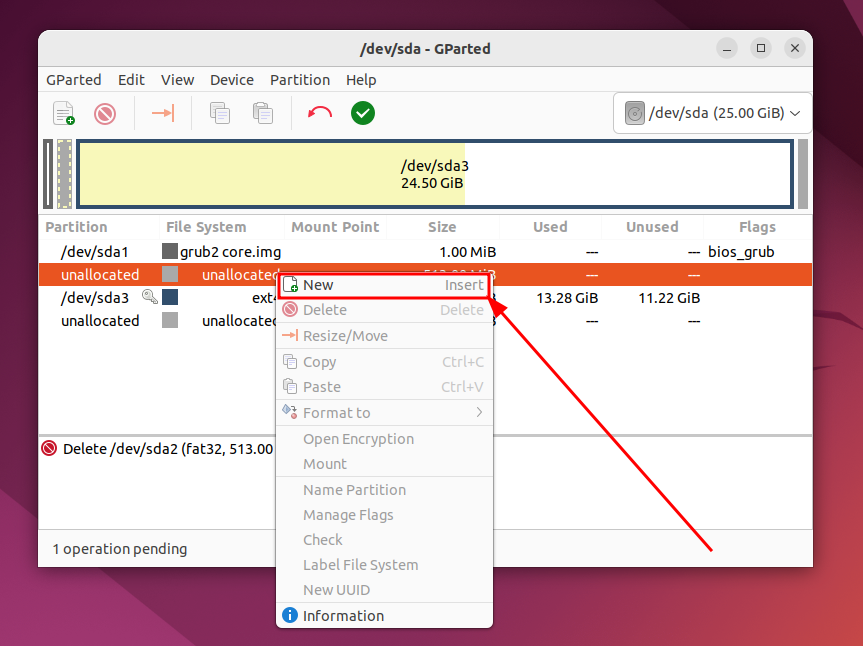
After that, right-click on the partition, and this time, click “New”.
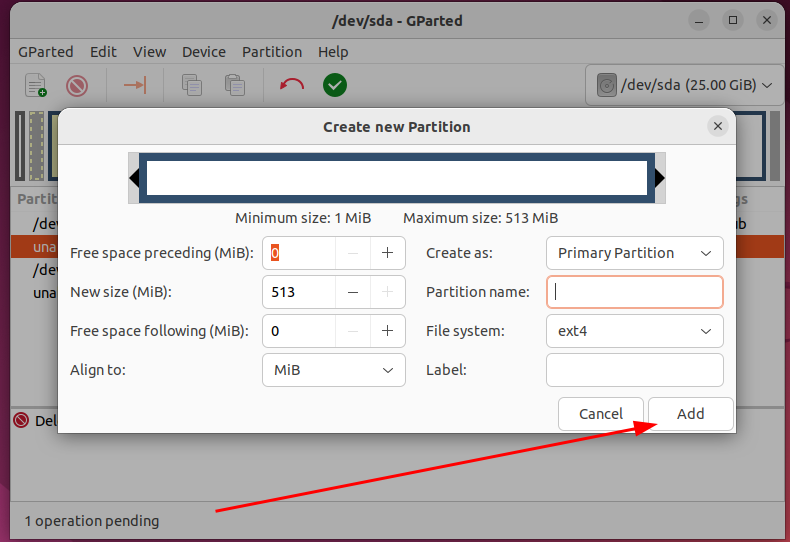
You should see a new window containing many options. You can set the size, give the partition a name and label, choose the file system, and do more. I’m keeping the default values here. You should fill in the fields according to your needs. Once you’re done, click “Add”.
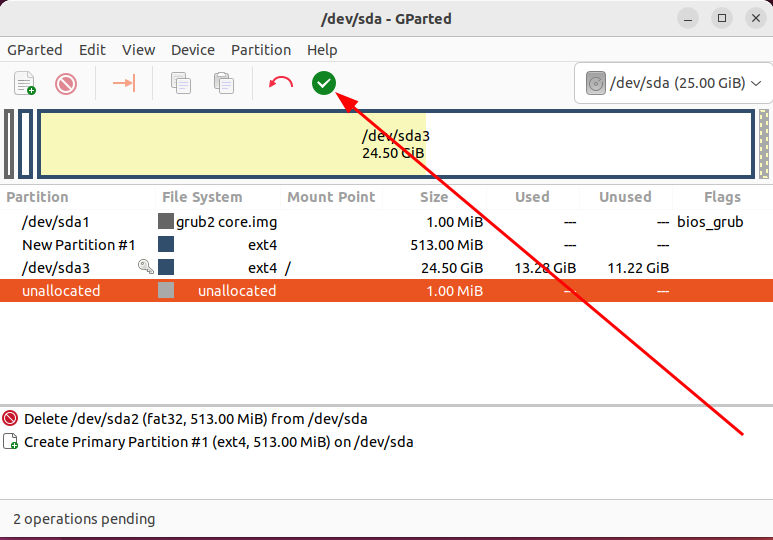
However, you will notice that the operations you just performed are listed at the bottom of the window. That’s because these operations are waiting for your approval. To confirm all these changes, press the green tick button from the menu bar.
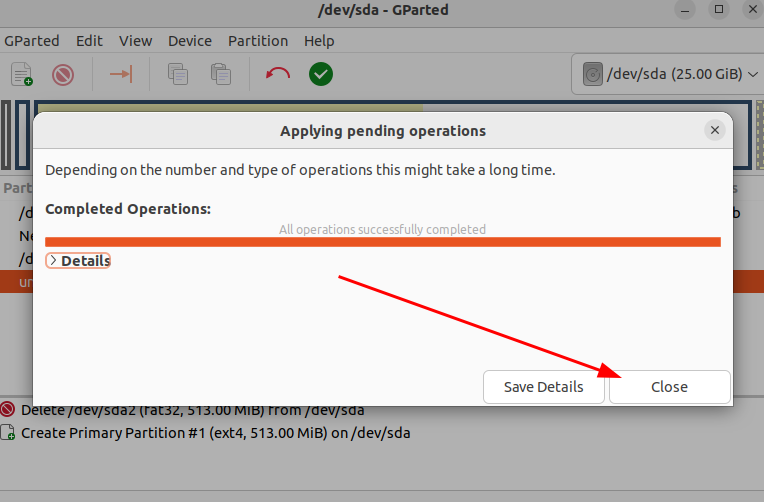
You will receive a warning about data loss. If you’re sure about the operations, click “Apply”. Once the operations are done, you’ll get a message about it. Hit the “Close” button to exit the window.
And now you will find the formatted disk listed in GParted with the settings you specified earlier.
Disk Formatting on Ubuntu Made Easy!
So that wraps up this guide. I hope you were able to format your targeted disk successfully on Ubuntu. If you have made a backup, now is the time to restore it to the newly formatted disk.
Also read:
- [New] Playback Operation for SRT Across Operating Systems for 2024
- [Updated] In 2024, Legitimate TikTok Growth Where to Find Trustworthy Leads
- [Updated] Pinnacle Pathfinders The Ultimate 10 Game Guide for 2024
- 2024 Approved Capturing the Echoes of Yesteryears Scanning and Storing Vintage Prints
- Comprehensive Review: Top Cable Modem & Wireless Routers for Enhanced Connectivity (Best Picks, 2024)
- Cost-Effective Home Theaters: Must-Have Gear for Budget Movie Enthusiasts
- Discover the Ultimate Selection of Gratis HTML Editors on Windows - Ranked
- How Does the IPad Pro M4 Stack Up Against the MacBook Air M3? An In-Depth Analysis of Capabilities
- How to Fly for Just $25/Ticket With an Amazon Prime Benefit Card – ZDNET Exclusive Deal
- How To Seamlessly Use Split Screen Functionality On Your MacBook Air
- In 2024, How to Change Google Play Location On Honor 80 Pro Straight Screen Edition | Dr.fone
- In 2024, Using B-Roll to Enhance Cinematic Quality
- Mastering the Art of iDevice Keyboards: Resolve These 6 Frequent Problems Now!
- Messenger Access Tutorial: Connecting without a Facebook Profile
- Top-Rated Powerline Network Converters: The Ultimate Selection for 2nD4
- Understanding Error Code 0xC0000185: A Comprehensive Guide to Identifying & Resolving the Issue
- Why Isn’t My Apple Watch Recording Steps? A Comprehensive Fix
- Title: Ubuntu Disk Formatting Tutorial: Discover Two Efficient Techniques
- Author: Robert
- Created at : 2025-02-02 16:00:57
- Updated at : 2025-02-07 16:13:30
- Link: https://techtrends.techidaily.com/ubuntu-disk-formatting-tutorial-discover-two-efficient-techniques/
- License: This work is licensed under CC BY-NC-SA 4.0.