
Step-by-Step Guide: Accessing the BIOS Setup on Windows 11 and Windows 7
Step-by-Step Guide: Removing the ‘Windows.old’ Folder on Windows 11 - Solved
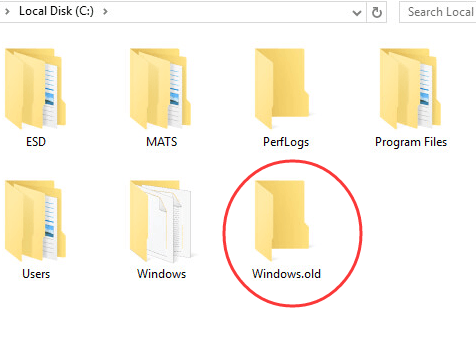
If you upgrade your Windows operating system to Windows 10, you would findWindows.old folder in Disk C like picture above shows.
The Windows.old folder contains all the files and data from your old Windows System.Thus it’s wasting a huge amount of disk space. So, we should delete it to free up space. Actually, Windows will automatically delete the Windows.old folder a month after you upgrade. But before that, we can delete it manually.
To delete Windows.old, not like delete a normal folder, we use Disk Cleanup Tool to delete it. Follow the steps below, you would know how to delete Windows.old quickly.
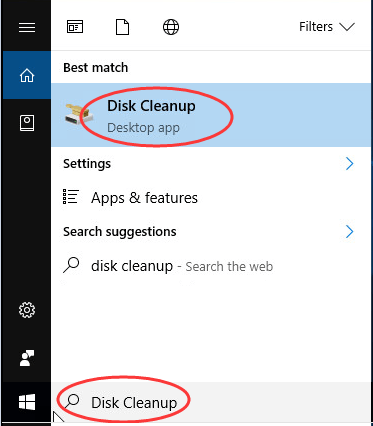
- Click Start button and type Disk Cleanup into the search box.
Then click Disk Cleanup .
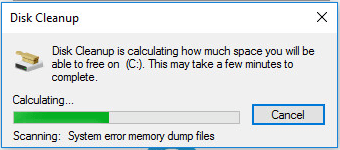
- Wait a little while for Windows scans files.
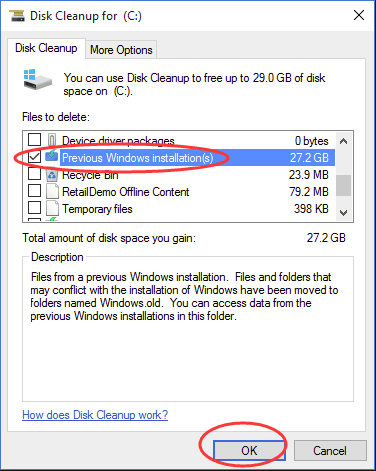
- Scroll down to tick on Previous Windows Installation(s ).
And make sure there no any other box is ticked on.
Then click OK to start cleanup.
That’s it. Just so easy! Delete Windows.old on your PC now.
- Title: Step-by-Step Guide: Accessing the BIOS Setup on Windows 11 and Windows 7
- Author: Robert
- Created at : 2024-08-18 21:12:12
- Updated at : 2024-08-19 21:12:12
- Link: https://techtrends.techidaily.com/step-by-step-guide-accessing-the-bios-setup-on-windows-11-and-windows-7/
- License: This work is licensed under CC BY-NC-SA 4.0.